Compatibility
berlin1000 drive is compatible with every MacBook that is able to read SDXC SD cards, which we tested back to the first unibody MacBook Pro with Firewire. All newer models can read SDXC cards and can use berlin1000 drive. Older models can work but we did not test them.
Please notice, that the current MacBook Pro Retina is able to read and write data on berlin1000 drive, mechanically though it is too long and sticks out. So we marked it “incompatible”.
berlin1000 drive is not recognized by your Mac
That happens sometimes, the card read can be picky. Please make sure you insert the berlin1000 drive with a steady motion and not too slow. When the drive is recognized but is not writeable, just remove it and try again.
berlin1000 drive is recognized by OS X but doesn’t show up in Windows 7 or 8
This is quite simple: just create a folder and copy some files on the berlin1000 drive. It then will show up in Windows.
My dog ate the adapter – what do I do?
You just write us an email here and we’ll send you a new adapter. :)
Using PowerNap with inserted berlin1000 drive
MacBooks can only use PowerNap with the long Standby time, when no external drives are connected or – in case of the berlin1000 drive – inserted in the SD card slot. Normal standby mode is possible without any problems and for those working with their MacBooks on a daily basis very adequate.
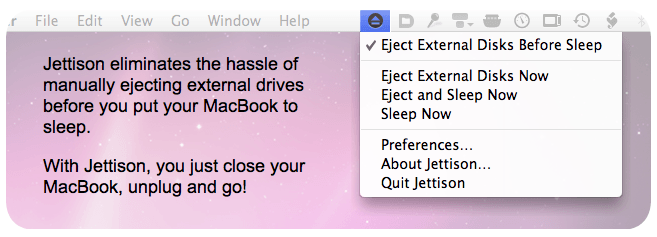
Those, however, who would like to maximize their standby time with inserted berlin1000 drive, we would recommend a very helpful tool called “Jettison”. It automatically ejects all your drives before standby and connects them after waking up your MacBook. With Jettison, your MacBook will get the 30 days of standby.
Get Jettison here: https://www.stclairsoft.com/Jettison/
Use your berlin1000 drive for Time Machine backups
If you’d like to backup your data on solid SD card memory, just use your berlin1000 drive as Time Machine device.
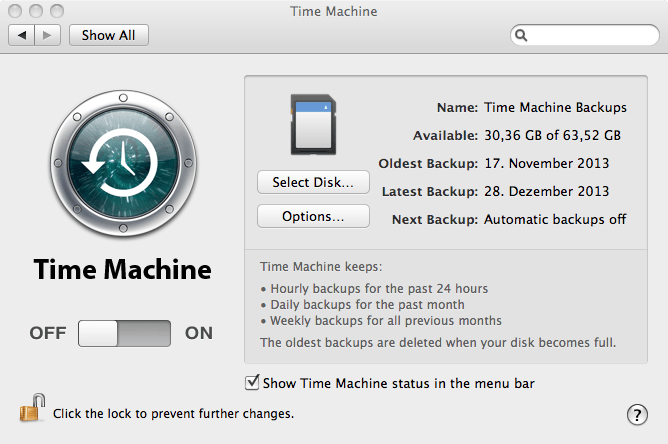
Go to “System Preferences” and pick “Time Machine”. After you switched Time Machine on, you’ll be asked for the drive you’d like to use. If you already have Time Machine running, click on select disc.
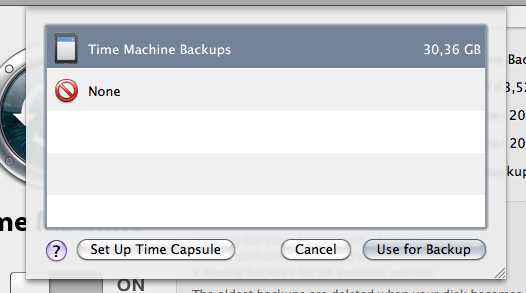
Your berlin1000 drive will appear here. Click on it and choose “User for Backup”. Time Machine will no reformat your drive – all data will be erased on the drive! After that, you’re done and Time Machine will do the backups on your berlin1000 drive.
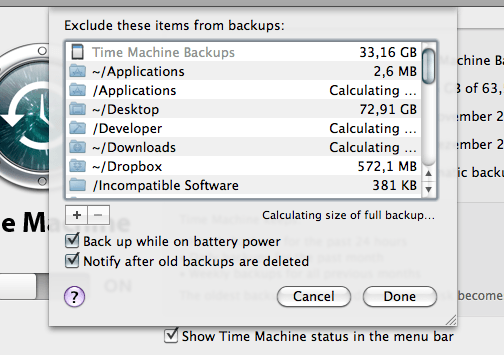
If you have more data than the berlin1000 drive offers, click on “Options” and exclude directories you don’t need to have backed up.
Transfer iTunes library to your berlin1000 drive
berlin1000 drive is perfect for storing your iTunes library. Here is how you do it:
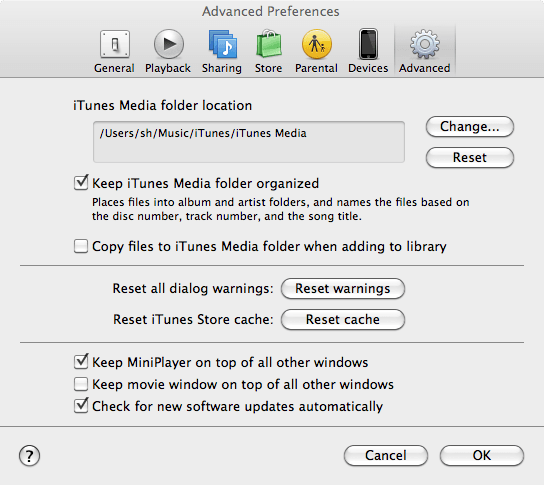
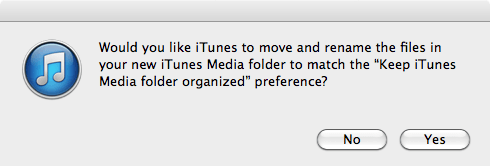
Open iTunes and then choose “iTunes” > “Preferences” > “Advanced”. You’ll see your current media folder location. Click on “Change”, then choose your berlin1000 drive and click “OK”. Now you have chosen to store all your media data on your berlin1000 drive. iTunes will ask you if you’d like it to move and rename the files if you have chosen that option – click “Yes”.
iTunes will now store all new data on the berlin1000 drive, but we still have to move the already existing data to it. Therefore, choose “File” > “Library” > “Organize Library”.
You’ll see two options: the first one will copy all your existing files on your berlin1000 drive. So have all you files on your berlin1000 drive now and on the old location in your “Music” folder. If you like to free up more space, you can delete the files in the old location.
The second option keeps the files organized. If you check it, iTunes will put Audiobooks in a “Books” folder, music in a “Music” folder and so on.
Formatting
berlin1000 drive comes preformatted with exFAT. This is standard for SD-cards and gives best performance results. You also can use berlin1000 drive in any SDXC reader. If you would like to reformat your berlin1000 drive for running TimeMachine for example, you can do that very easily:
In the menu bar choose “Go”, then “Utilities”. Pick the “Disk Utility”.
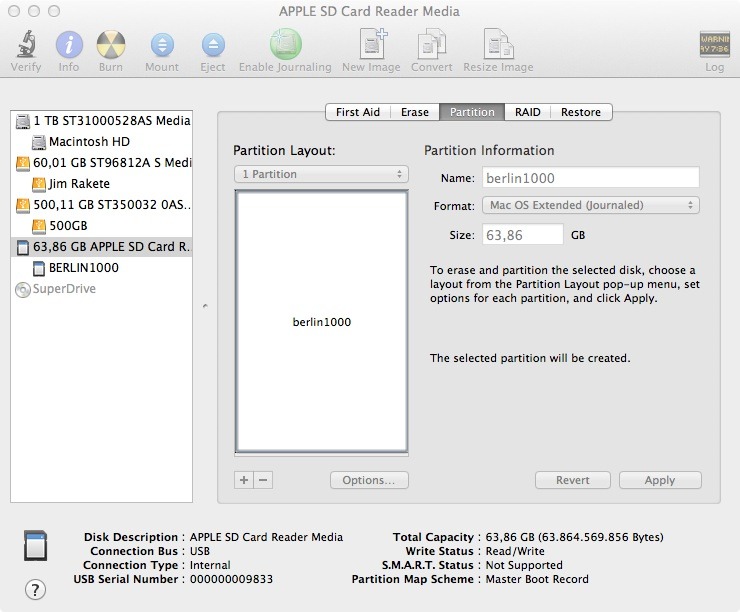
One the left side, click on berlin1000 drive and then choose “Partition”. Pick “1 Partition”, name the drive as you like and for file system you choose “Mac OS Extended (Journaled)” – or exFat for example, if you’d like to go back to the original state.
If would also like to boot from berlin1000 drive, it is important to click on “Options” and then change from “Master Boot Record” to “GUID”. That way, berlin1000 drive will show up as a start volume, when pushing the “alt key” during the boot sequence.
Click “Apply” and your berlin1000 drive is reformatted. All data will be erased during the process!
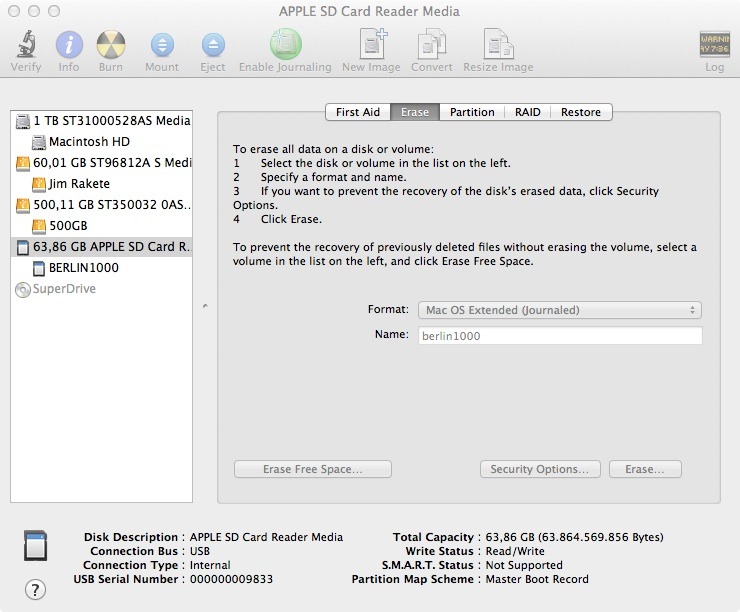
A faster way to just erase date is to use the “Erase” tab of the Disk Utiliy. You can’t change partition or choose GUID, but you can pick another file system. This is mostly practical if you’d like to erase all you data.
